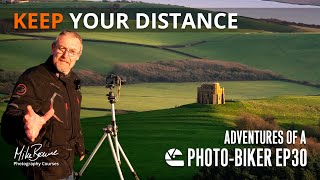
Photographing A Motorbike - Photo Biker 9

A couple years ago when pandemics weren't even on the radar, I made a video about photographing a motorcycle. If you saw it before you might remember it wasn't great. Well, I know it's taken some time but here at last is the remake. And like everything photography, it's all about using light. Light in photography is king. It will make or break any image.
Why was the earlier video not great? Well I've always kept bikes and photography separate. Riding a motorcycle is where I go to relax and gather my thoughts. Exploring back roads is my meditation and I didn't want it to become work. Apart from the occasional snap, I'd never tried to take photos of a motorbike before. And like everything, we have to go on a learning journey, we have to get it wrong before we get it right. We are all experts and beginners simultaneously.
Luckily a mate of mine is motorcycle photography legend Gareth Harford. He shoots Moto GP and new bike launches for Triumph, Harley Davidson and others. When it comes to photographing a motorcycle, Gareth's the man! Being a lovely guy he was happy to give me a couple of tips to pass onto you.
Lighting is always king. You can have the most awesome bike, model, location etc but if the lighting isn't appropriate the image will be mediocre at best. His advice was simple. Push a bit of light back into the darker areas around the engine and it'll pop. So, armed with an old collapsible reflector I took my cosmetically unrestored 70 year old BSA B31 out to find some pools of light to scoop up and push back into the image.
Boy what a difference..

Here's a step by step guide to equipment needed and the qualities of light to use.
- A reflector. It's easy to make one by covering a piece of cardboard with tinfoil. Ideally it should be approximately 3 feet wide. A bigger light source makes nicer light.
- Camera with mid to long lens
- A clear sky and hard low angled sunlight.
- Position the bike with front end facing the light - at 30 degrees to the light.
- Position reflector opposite the light source (sun) and adjust until it reflects to the area you need to highlight
- Moving the reflector closer to the bike increases the amount of light (brightness) you're reflecting
- Moving the reflector further away decreases it
This technique works especially well on bikes with black engines that kinda suck up light and become black holes below the tank. For polished a chrome engines move the reflector further away until it looks right. And who decides what looks right? It's your photo so you do.
This is unlikely to work using a wide angle (short) lens because it'll be harder to lose the reflector from your composition. Longer lenses have narrower fields of view and as you saw in the video, losing the reflector from a shot is easy. You increase focal length and move back a bit until it's the composition you want. Focal length and composition are best friends and by making them dance together you will drastically improve your composition.
To truly master your camera, the settings and controls you need, light and composition my 4 week online Masterclass In Photography course will explain everything you need. Simple steps, in the correct sequence to work seamlessly, weekly exercises for practical experience and a 100% refund guarantee. Most photographers buy more kit when what they really need is to know how to use the kit they have already...
Best wishes until next time...

Products in this Category


| How to Use a Polarising Filter - Photo Biker 26 |