Shoot Into The Light
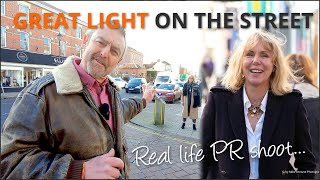
I love to shoot into the light and where possible, include the sun into the composition. I did just that on a recent photo-shoot for Louise James, inventor of The Buttafly Yoga seat.
When doing any shoot, there’s more to it than just camera settings and techniques, you have to understand the psycho-graphics of the person who’ll be viewing the image and it’s purpose. What's the most important part of the photo? How do I make it stand out? Is it to be used for marketing? Are graphics or text likely to be added?
Once you answer these questions, you can begin to think about what’s needed in the photo and pre-visualise the shot being used to fulfil its different functions. There are no camera setting for this, it’s the photographer’s job. My 7 Building Blocks of Photography course teaches the fundamentals of the thought process needed for all photos.
The primary use of these images of The Buttafly is for a banner image on Louise’s website, like the one at the top of this page. Text and / or graphics are likely to be added by her designers, so they’ll need space in the photo to put them.
That tells me to shoot with plenty of negative space around the subject. If the file is big enough it can be cropped later by designers if they want to be more close up on the seat in use. So composition has to be done in camera, not in post-production because we don’t want to lose any pixels.
The Buttafly has to stand out. Backlight on an human figure in a clean empty composition is a powerful way to achieve it.
Yoga is all about health, well-being and peace. Imagine peaceful it would be if it was taken in a front room, maybe with a radiator and corner of the sofa in the background? Not great eh!
Negative space composition makes an image feel peaceful so that fits with the need for somewhere to overlay text and graphics if needs be. Next question is what to put in that space?
Obviously whatever it is must not conflict with the overlay. If anything it has to enhance it and draw attention to it. That leads us to something that has some detail that works as part of the image but is flat, calm and clutter free. What better that the sky? That fits with the whole Yoga, meditation, calm theme we need.
Backlighting and shooting directly into the sun is always eye catching and dramatic, and because of the exposure difference between subject and background, it’s easy to make it bright and clutter free so any overlay will stand out.
But what about those burnt out highlights? If the sky is clear blue with no haze, the sun itself will obviously burn out, but so what? If you look at the sun with your eyes it’s burnt out, even when wearing sunglasses. If it weren’t it’d look weird and un-natural.
On the day we were shooting there was quite a lot of haze which shatters the light when it’s back-lit, so instead of a clearly defined white disk, it’s a bright burnout across a large areas of sky. And burnt highlights are wrong - right?
Why are they wrong? Nothing is wrong if it’s what you planned for it. And in this case we only want a tiny bit of detail in an area where text and graphics will stand out, so it’s perfect in this case. It also forces attention onto the place we want people to look, the Buttafly seat in use in a tranquil location.
Exposing for this shot is tricky because all the backlight will probably confused your camera’s light meter into making the shot too dark, Louise and the Buttafly will become a silhouette and that’s not good.
The only way is to exposed very carefully for the subject, minimise burnout and shadows blocking up as much as possible. I always check my histogram for this because it’ll tell me what I need to do with the exposure to get maximum data in these areas.
You have to shoot RAW and make your own jpg file. I promise you the camera won’t be able to handle it on it’s own. Use Lightroom to manage how you want the shot to look.
This is all part of the pre-visualising process photographers have to go through for any image. Cameras don’t take pictures, they’re only tools for us to take pictures with…