Combining ND Filters

I don’t often use filters in my photography, but there are times when they are invaluable because you’d be unable to get the shot without them. Especially true for Landscapers wanting to darken a bright sky, or convey a sense of movement in an image.
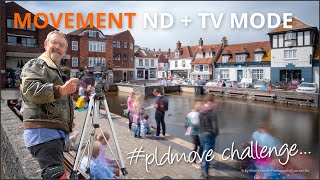
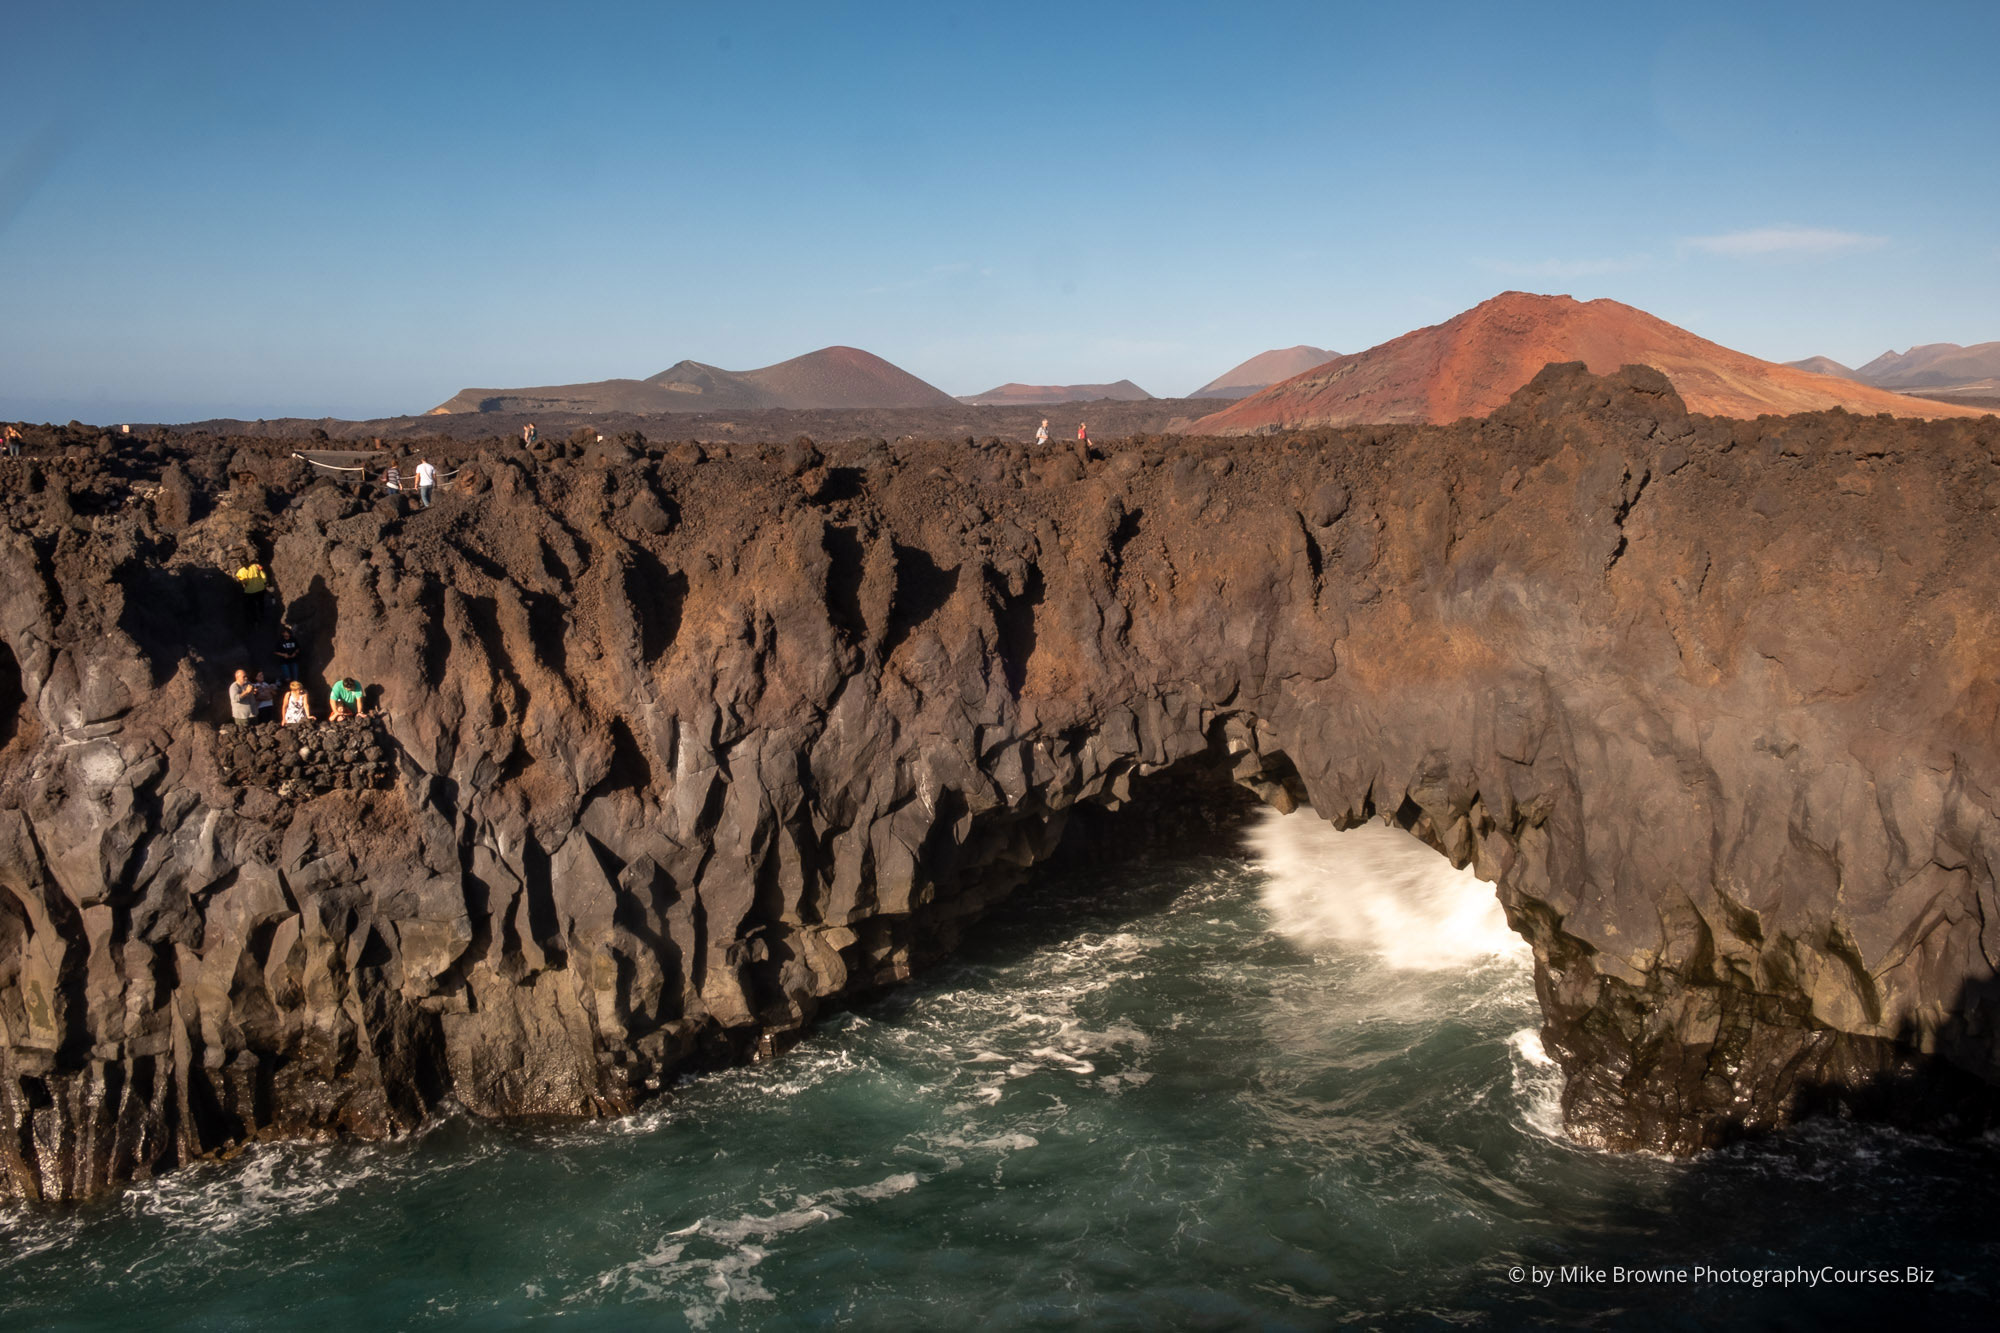
I was recently at one of my favourite landscape locations on the Lanzarote workshop where the geography combines for a stunning vista, whilst at the same time making it difficult to expose for the dark cave mouth with the waves crashing into it and what is usually a bright sky above.
Provided you pay attention to the histogram and get the exposure perfect, shooting RAW is a big help. But if you equalise the bright and dark areas and bring them closer together, there’s less chance the image will look over processed because it’ll need less work. Which can only be a good thing because the less hard an image is pushed, the better it looks. It saves you time too.
My motto is always get as much work done in camera as possible and make sure it’s done right. Post production isn’t for fixing sloppy camera work. It’s for bringing an image to life and making it as you remember it for real.
Step one is to analyse the scene and how you want it to look. How do you want to portray movement. Do you want the waves frozen in time with each droplet suspended in mid air? Or do you want your viewer to get a sense of washing back and forth? Personally I’m not a fan of extreme misty movement blur, but I do like just enough to convey a sense of movement.
Once you’ve thought the shot through by answering these questions, you’ll know which filters to use. In this case the sky needed darkening, so there’d be more exposure latitude available for the shadow areas. A soft graduated filter (in this case 1 stop) deals with that nicely.
Next we want to blur the water a bit. There’s no rule which neutral density filter to use because it depends on 3 things
- How fast the water is moving
- How much you want to blur it
- How much available light there is
When light levels are low you might not need the ND filter at all and be able to achieve the desired effect by combining ISO and aperture to give you the shutter speed you need - for the amount of blur you want. You just have to try it and see as you saw me do in the video.
The light was bright when I was there and at the smallest aperture of f22 and the lowest ISO of 200 (that’s as low as the XT-2 goes) the slowest possible shutter without a neutral density filter was 1/20th second. The waves were moving slowly and 1/20th second wasn’t slow enough to get the movement I wanted.
OK, there's a bit of movement, but this is a big fast moving splash. I wanted to capture the movement in the water, not the splash which is just a big white blob.
Next step was to get that shutter speed down by removing light. To do this I used a 6 stop neutral density filter. Now it was a matter of trying different speeds to see what worked for the way I wanted the water to look.
I tried the longest speed I could get first. With the ND filter taking away so much light, this was 2.5 seconds at an aperture of f22. Too much movement blur for my taste.
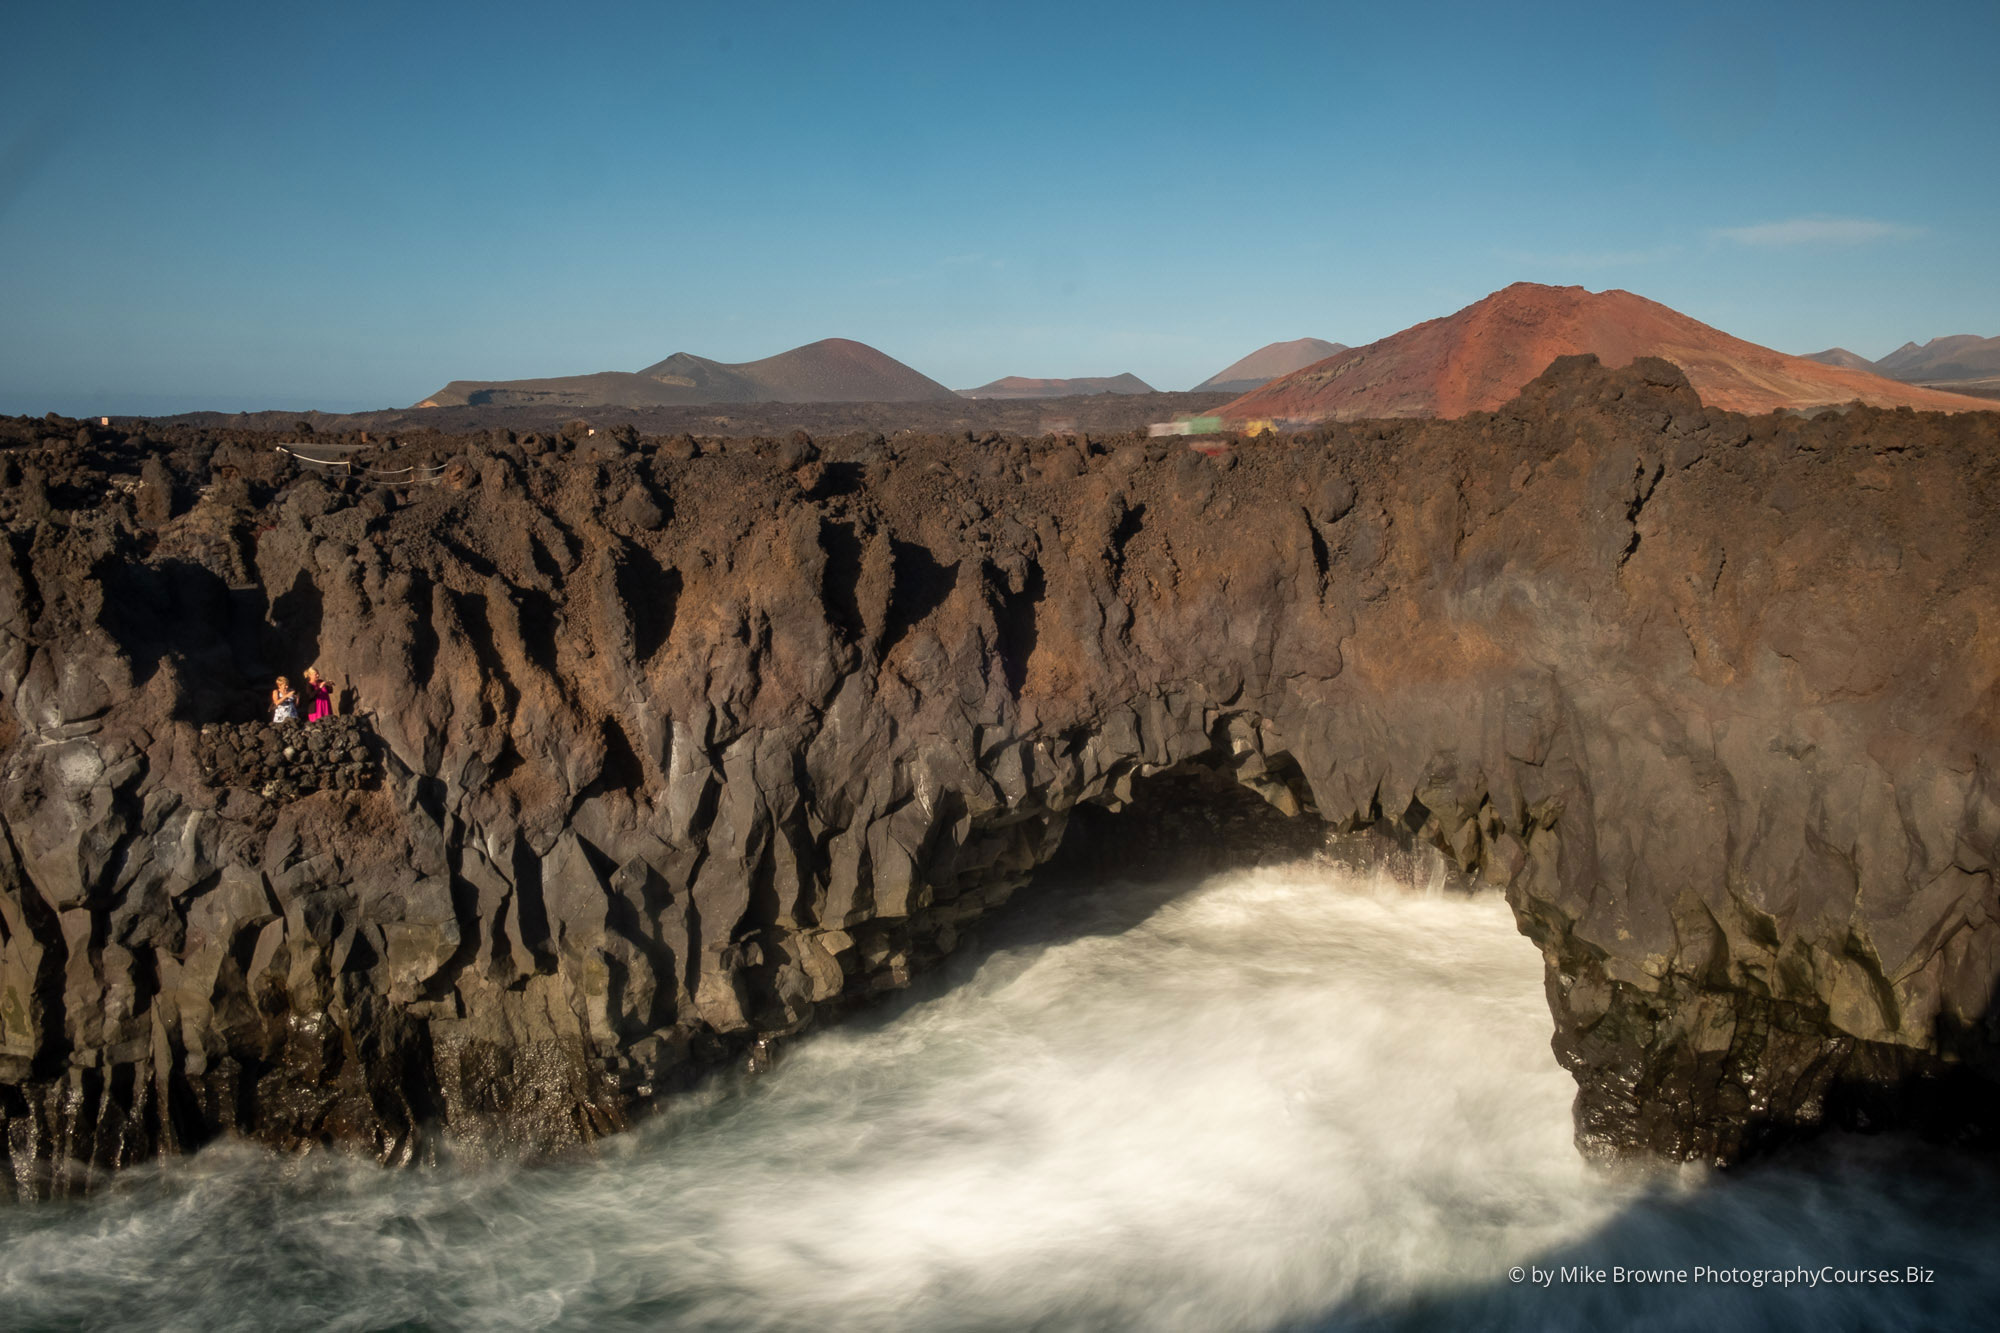
It needed more definition in the water. When movement isn’t constant like it would be with a waterfall for example, you have to keep adjusting and repeating the shot until the wave and shutter speed combine just right for the look you want. Sorry, there’s no shortcut. It’s always changing.
I wanted movement but not so much the definition of the waves were indistinguishable. Step 1, set faster shutter speed. This time 1/4 second. To maintain correct exposure the aperture had to be opened up to f8 to let in more light .
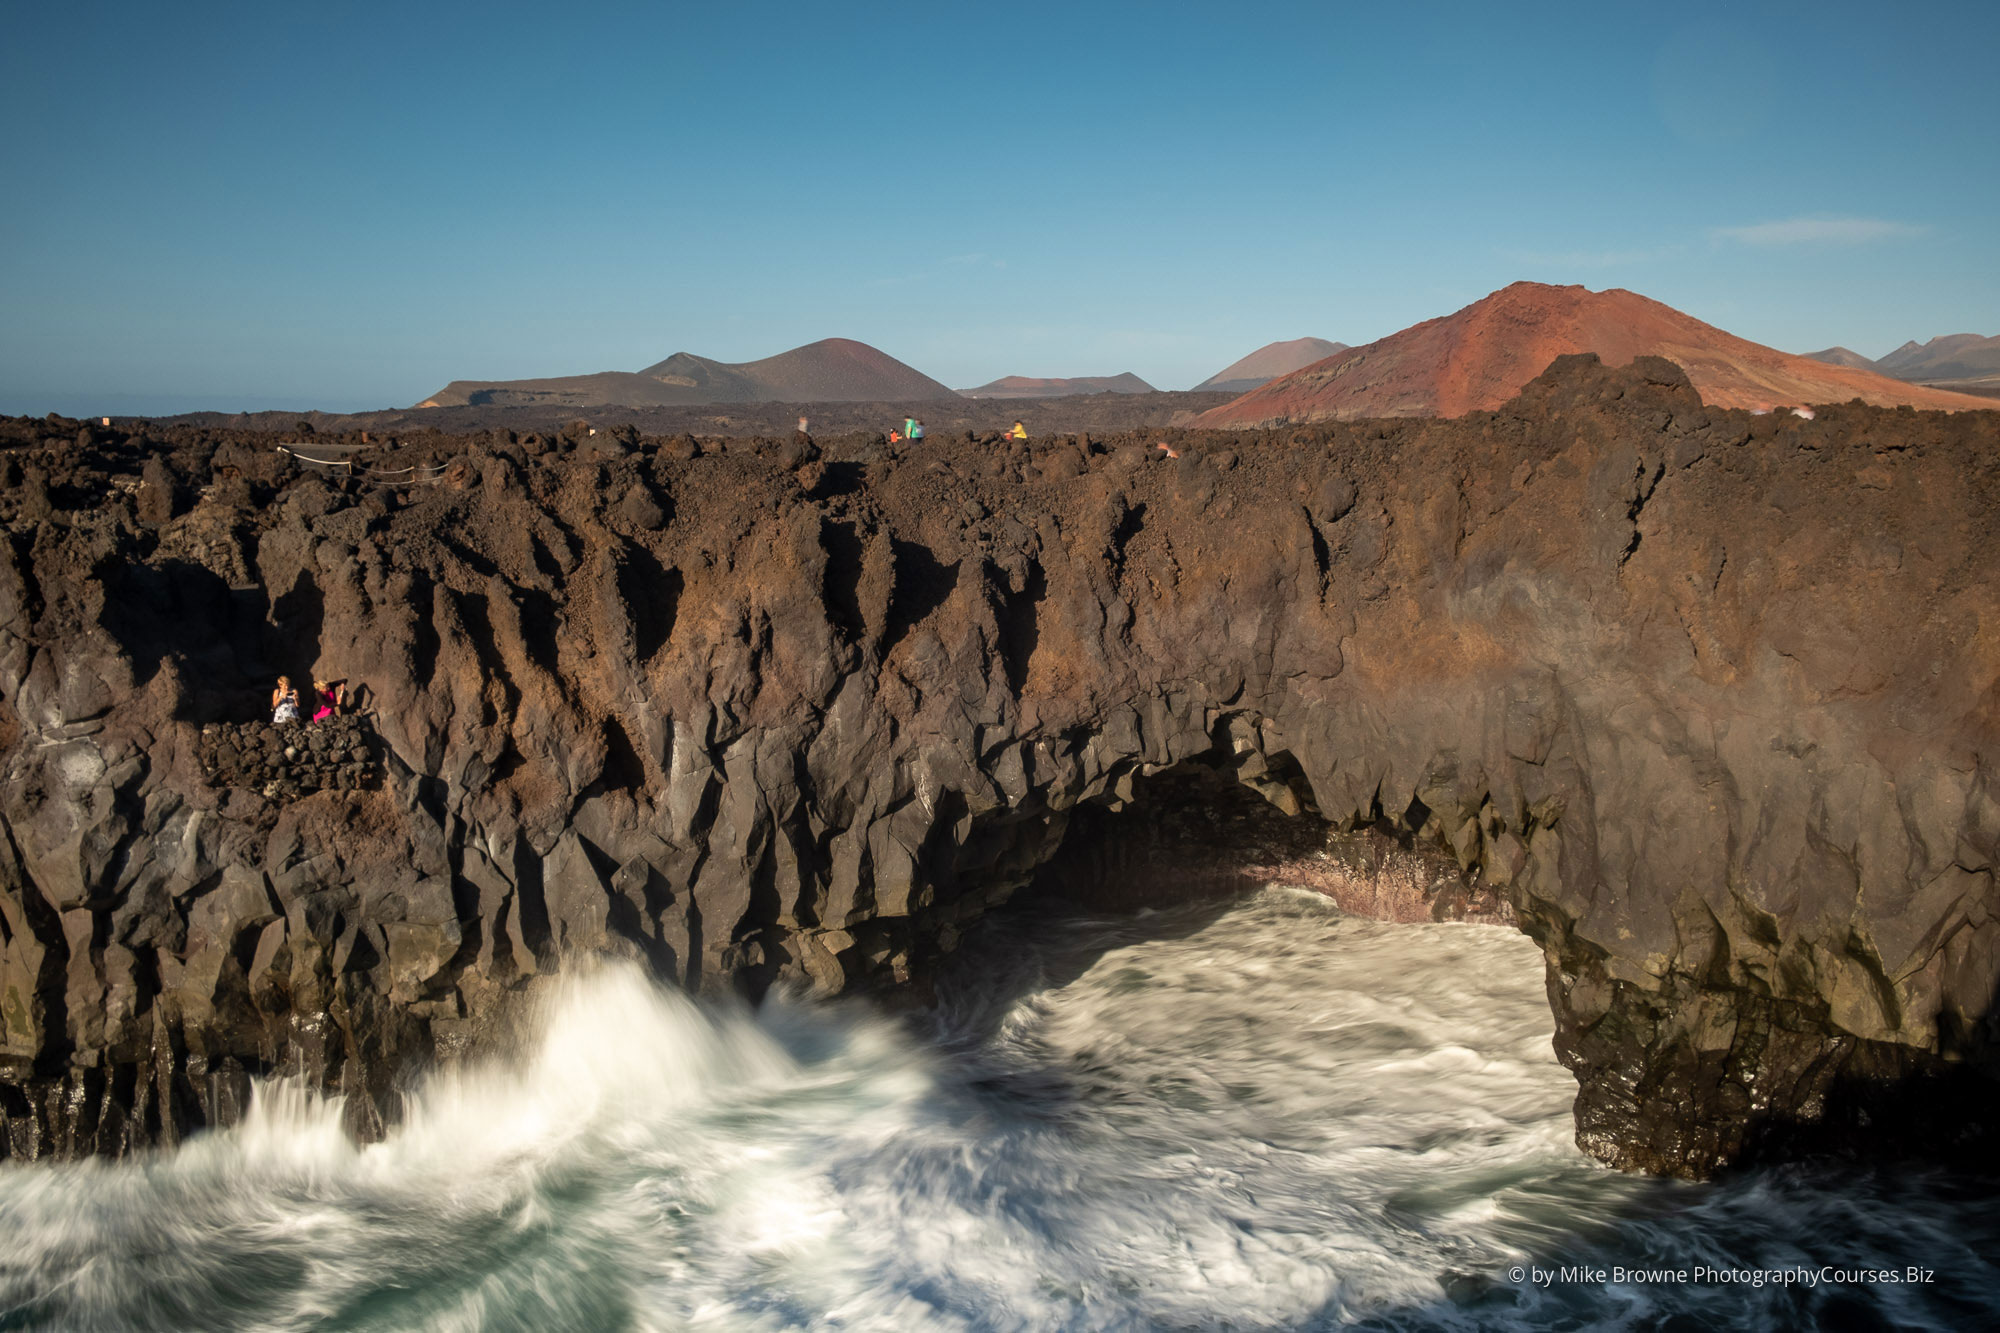
BOOM! Dark blue sky by adding the Neutral density grad filter and the perfect shutter speed to get the movement I wanted by adding the full Neutral density filter.
How did I know the shutter speed needed to be ¼ second? I didn’t. The image taken at 2.5 full seconds was too blurry so I chose a faster speed to see how that would look. It just happened ¼ second worked. There are no rules with this kind of image, you try something and if it doesn’t work how you want, make an educated guess what to change and try again.
When you think a shot through one step at a time it’s easy to find the settings which make it look how you want. This is the photography thought process that reverse engineers a shot from what you pre visualise to capturing it perfectly in camera. Whatever subject, genre or situation, the settings don’t give you pictures - pictures give you the settings. You just have to ask yourself the right questions which I call the 7 Building Blocks of Photography.
Be well until next time….