Sunset Photography Tips

To get the best from your Sunset photography, it’s a game of patience waiting for light to change. Of course it may be a non-event. (Have you seen the last attempt I did at this when the sunset was a complete disappointment?)
Sunsets and sunrises are one of nature’s great colour shows, obviously put on solely for the benefit of us photographers. But as always, effort in = results out. So start at the beginning by checking weather forecasts and the time the sun actually sets behind the horizon.
Think like a photographer. Plan your shoot as well as your shots.
Personally, I prefer shooting during the hour before the sun disappears.
This is called Golden hour because the light is a rich Gold colour. Remember, cameras ‘see’ light differently to the way our eyes do. So to us that colour may be subtle and almost un-noticeable to the un-trained eye. But I promise it’s there.
I love to shoot at this time because I like including the sun in the shot. It’s more dramatic and eye catching. If you’re lucky enough to have a haze free blue sky with fluffy white clouds, it’s even better because there’s detail in the sky.
Our eyes (or rather our Brilliant Brains) colour correct everything so we don’t always notice it. Like when you’re in the front room reading a book by the room lights. The light is yellow but we still see white paper. Take a photo and it’ll be yellow.
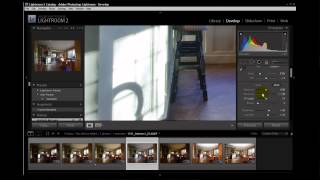
The best way to overcome this is by shooting RAW so you have maximum colour data in the file which can be brought out when you develop it into an image file in Lightroom or similar.
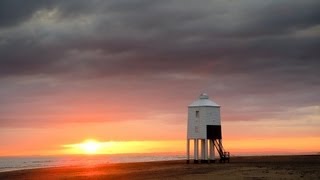
As the sun dips lower the light usually takes on more red, which becomes more apparent after it’s behind the horizon, resulting in those blood red skies.
Approach Susets as a Landscape Shoot.
I like to think of sunset photography not just as a picture of a red sky, but as a landscape shoot at or before sunset. Let’s see where you are and what’s going on around you. Using the sky and setting sun as a backdrop to somewhere interesting will result in a much more interesting image overall.
Personally I like graphic, geometric shapes and lines which is why I made this film at the old salt pans on Lanzarote after running my yearly workshop there. The abandoned windmills, once used to pump seawater from the lagoon into the salt pans add interest and I love that sense of abandonment.
The white salt in the little square evaporation ponds reflects the colour of the sky. And if you’re lucky enough not to have cloud on the horizon, the sunlight sparkles off it too. Sadly I did have clouds but Ho-Hum, can’t win ‘em all!
So where will you go to shoot sunset? How do you know what will or won’t work?
Always look around you and notice your surroundings, wherever you are. Carry a compass and see where in the sky the sun will set, or rise for that matter. If the windmills, lagoon and ocean beyond faced south, obviously the sun will set to the right, and won’t make an appearance.
That doesn’t mean it’s a bad place, it just means it won’t work if you want this shot. There’ll be plenty of others you can take if you look for them.
When using straight geometric patterns as foreground as I was, make sure you stand in exactly the right place to get them symmetrical. If they’re even a bit ‘wonky’ it’ll spoil your shot.
What about exposure settings for a sunset?
Settings vary all the time from shot to shot. As light levels change, shadows come and go and you choose how you want the final image to look. These things all affect settings and that’s why my settings are no real value to you.
You have to learn what the different settings do, work back from what you want the image to look like and that will tell you YOUR settings.
Sunset exposure is mostly a matter of capturing maximum data in the histogram. You cannot trust the LCD alone because our eyes adjust to bright or dark light and that affects how bright or dark we perceive the screen to be.
I find evaluative metering mode usually gives me the closest results for what I want. But I always check the Histogram and adjust if needs be. Don’t think your camera know better. You’re the creative one here so tell it what you want.
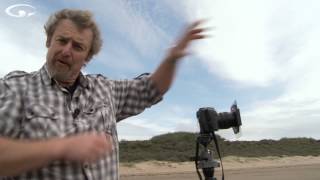
Take your time.
As you saw in the video, I didn’t take that many shots. Most of the time was spent looking for the best angles and watching the light. In the whole hour I shot only 38 frames, including test shots for composition, exposure and to show how careful we have to be with composition for the video.
Slow down, think your shots through, concentrate on what you’re doing and come home with 4 or 5 photos you love, rather than 100+ that disappoint.